Wednesday, May 26, 2010

Revelations are such Wonderful things: Library Thing and I, Take 2

 T oday I finally took the time to actually sit down and fiddle with my Librarything catalog and am amazed with the results and embarrassed over my past deductions of it. I have found that not only does Librarything supply the call number for most books, it also allows you to customize the way you view and sort your information so that you can have a complete catalog that meets your needs. Huzzah! Not only will this save me a ton of time by not requiring me to search Worldcat, it also allows me to sort my books by call number order! I am so thrilled and can't recommend the site enough.

So, the plan now is to use the tag area to list "collection" information. An example of what I mean by this is the tag "Craft." If this tag is given it means that this book is in my craft area, on a bookshelf there. So far I only have three categories, "Craft," "General Collection," and "Special Collection." I hope to keep the division of areas minimal, so I think only having three will suffice for me.

The other great feature I found today was that I can decide how the list is displayed and ultimately printed. This was very exciting because it allowed me to realize that the LC Classification can be shown on my list and I can sort by it. Thus my view of the catalog is now set with these specifications:
Small picture of cover, Title, Author, Tags (collection information), LC Classification, and Date.

I know that this process has everyone on the edge of their seats...so be sure to check back soon for more updates and possibly more admissions of how quickly (and wrongly) I jump to conclusions.

*cap supplied by Jessica Hische at DailyDropCap

Friday, May 21, 2010

Inspiration 101

 W hen it comes to the wonderful world of crafts and the amazing field of book production/design I have a lot to learn. I am a newbie to taking both areas seriously and when I see all the things I want to do and all the things I need to learn sometimes I can kind of freak out a bit. I mean, it can be very overwhelming. I have Studio on the Square and Mindy for most of my book production/letterpress needs, but crafting is a different story. Not only can the amount that I need to learn about crafting be overwhelming, but all the information out there can be too. There are so many sites and books full of how-to's and projects, but I have found so few that I think actually give enough coherent information to be worth following or purchasing. So, I just wanted to take this opportunity to point out a website and a book that I have just found to be ever so incredible and most definitely inspirational!

The Book:
While I have heard often of this little work of incredible-ness I had yet to pick it up and riffle through it until yesterday and as soon as I saw what a treasure it was I bought it on the spot. Now, to cease with this mystery and get on with it, the book I am speaking of is Stitch n' Bitch: The Knitters Handbook.


I know for anyone who knits the first thought must be, "Well duh," but as someone who has just begun knitting I think it is important to shout from the rooftops that this is a MUST for any knitting library. I had been told by so many people of various books that would do wonders for my understanding of this craft, or that I just had to have and so I was slowly ILLing items from my public library to try and figure out which ones were worth my money. I had overlooked this one though because, for whatever reason, I kept thinking I would get to it eventually. What I hadn't realized until I actually looked through it though, was that as a beginner I needed this. This isn't a book to buy later on down the line, although I am sure it will forever be helpful and I will always be picking it up as a reference. Stitch n' Bitch is full of incredibly understandable and helpful explanations of almost every little part of knitting and I can say, just from the little I have read so far, I have already had at least three "ah ha!" moments.

The Site:
While I had not ever heard of this site, it is something I stumbled upon two days ago and have already visited a few times.  How About Orange will probably always be putting me to shame, in terms of crafts I can do and blog quality. This blog is absolutely incredible, with free downloads, tips, and tons of tricks! In fact I got that lovely W from DailyDropCap because Jessica had the awesome good sense to blog about it. There are so many many things on this blog and I am sure that I will try a few and post about them on here...and I am sure sometimes I won't even realize she posted about how to do these things in the past (like with the buttons...which is how I found this blog, searching for button terms after I had already made them). So, I suggest to anyone who reads this humble little blog and is interested in making crafts to swing on over to How About Orange for some superdity-duperdity fun!

Thursday, May 20, 2010

Where is the Knowledge we have lost in Information? -T.S. Eliot

 I could go on forever about how important I believe libraries to be and how in this modern age we do not give them nearly enough credit or funding. I could further that discussion with a tangent on how in order to meet these harsh realities libraries are starting to be run as businesses as opposed to cultural institutions, becoming more concerned with buzz words and the latest fad than with the preservation and advancement of not only information, but the objects that store this information. I could then remonstrate on how much we are losing by forcing libraries into these boxes, only to then ruin them altogether by withdrawing their funding.

Instead of doing all that though, I will point to this more lighthearted and awesome video and say, "Please help keep our libraries open!"

Wednesday, May 19, 2010

A Tack-tful way to Spruce up Bulletin Boards

Okay, okay, I know that the title for this post is a bit over-the-top, pun-o-refic, but I couldn't help it!! I am so excited about the tacks I made last night and how fun they make my bulletin boards. They are a great way to add color and personality without having to do something a little more complicated, like cover the cork in fabric or the likes.

Making tacks is just as easy as covering buttons, you only need to add a couple steps. The supplies you will need are fabric, flat and round topped tacks, flat-back buttons with pusher and "button well" aka base (you want to make sure they are a size that will fit the tacks well, I used 1/2 inch and it was a match made in heaven), craft glue, and of course scissors.

Supplies (after covering the buttons):


The first thing to do is to cover the buttons with your favorite fabric. I used some of the leftover fabric from the scarfette I made...which matches my craft space quite delightfully.

A jumble of flat-backs:


Next you want to put your craft glue in the dip in the back of the button and press the flat part of the tack down on top of it. While I know it doesn't seem like it matters whether you put the glue on the tack or the button, I found that it did. When I put the glue on the tack instead of the button they didn't really stick together because you can't coat the tack like you can the button dip...and so I impart that wisdom onto whoever may read this.

 With those steps done the next is just to wait for the glue to dry. I would suggest waiting 24 hours, although I will admit that I only waited a few before I put the tacks on my bulletin boards...but I was sure not to yank on them or anything. 

Close up time:


With all of that hard...hard work done you can now relax and let your tacks sit pretty and do all the hard labor!! I know I absolutely adore how they make my craft space both look better and feel all the more craftier!!

Tacks in Action:


 Oh, just one more shot:


And I promise, I am working on getting better at taking pictures!!!

Sunday, May 16, 2010

A Fidget Transformation

I have finally finished the scarf I made to go with the buttons from the last post. I had wanted a light scarf that could be worn in the early spring and throughout the fall and I have to say that I am very happy with what I ended up with.

The first step in making this scarf was actually to go hunt for some yarn. I really wanted something colorful and fun and so I went to Patricia's where I found a gorgeous "glaze carrot" colored kettle dyed merino wool by Malabrigo.

The Yarn:


I actually have a purse that was my grandma's in the 60's that is this same color, and so I was further persuaded to purchase this yarn by the thought of how fun it would be to have a scarf to match the purse.

Once the yarn was chosen though it was time to look for a scarf pattern I liked. As I already mentioned I wanted something light, but I also wanted a pattern to match the frolicy feel of the color I had chosen. After an attempt at one pattern that I realized I really didn't like after getting about 1/3 of the way in, I found the awesome fidget pattern. This was such an interesting looking design to me and the fact that the example image was in orange better helped to show me how great it would look with this yarn. On top of that I really liked the idea of something that allowed me to add more color with buttons and was short enough to only wrap around my neck.

As the pattern says you can kind of fool around with the measurements and such, so I did exactly that. I wanted the scarf to be a little wider and shorter and thus I cast on 23 stitches instead of 17 and at the end, for the button hole row, I added three knit stitches to both sides of the row. What I ended up with was a curly and almost cute scarfette.

Initial Product:


After this, as you can see from my last post, I went ahead and looked for fabric to make buttons out of and landed on the awesome flower pattern.

The Scarfette meets its Companion:


With the buttons then made I needed to block the scarf before I could sew them on. This was the first time I ever attempted to block anything, and I therefore probably didn't do the best job ever, but I tried. After doing some research into how to block an item I decided to employ the method of soak it and leave it.

The first step of the soak it and leave it method is to pin down the scarf. Everything I read said that it was best to pin the scarf to a board for this, but I didn't have one and didn't have the money to spend to get one, so I just used a towel...but just to clarify that probably isn't the best object to use. I went to Purl Soho to get the pins and set to work.

Pinned down:


Next I had to coat the scarf in water and since I didn't have a spray bottle I improvised with a simple bowl of water and a washcloth.

Supplies:


Submerging the washcloth:


Applying the Water:


Once the scarfette was amply wet I patted it down and applied a few more pins and walked away for three days. After that time the yarn was completely dry and I unpinned the scarf and sewed the buttons on in the appropriate corresponding spots on the opposite side of the button holes. I used leftover yarn to sew the buttons so that it wasn't noticeable on the wrong side.

Finished Scarfette!:


As you can see my blocking wasn't perfect, but I still really love it. Since it wraps around my neck it really didn't need to be tip-top because it curls a little anyway, and so I left well enough alone.

All Buttoned Up:


I was so excited that the weather turned colder again so I was able to wear this and I went out strutting it around and feeling all the more delightful for it!!

This is Bliss:

Friday, May 7, 2010

This is How it Starts: Making Buttons, the Beginning of an Addiction

A scarf that I am in the process of finishing calls for buttons and since I wanted really great and folksy buttons for it I began a search on Etsy. After quite some time of searching though, and despite some pretty great offerings on Etsy, I had not found any buttons that I felt were super perfect for my scarf and so I began to wonder, "could I possibly make these buttons myself?"

Though I had admired cloth covered buttons for some time, and have bought them a few times, I never really thought about how they were put together until I used them in jewelery. I decided to use one of the buttons I had bought, for a project gone awry, to make a necklace and when I popped the back off I realized that it was just cloth pushed down into the back of the button. Nothing fancy. So, when the thought began to creep into my mind that perhaps I should make these buttons myself it didn't take long for me to jump into action.

First I searched for instructions on the process, but I honestly found it hard to follow the written ones. Thus, I moved onto searching videos. Many videos on the process seemed to over-complicate the matter and were pretty long. I finally found one though that was very straightforward and was amazed at how easy the whole thing looked.

Therefore, with my new found enlightenment I went on the hunt for fabric and button making kits. Finding the fabric actually took me a while because now not only was I looking for a great fabric to match my scarf, but also a fabric that would introduce me to the act of making buttons...it had to be special. In the process of searching for fabric I was introduced to Fabric.com where I ended up ordering a simple and yet colorfully cute yard of fabric. I then went onto Etsy again and purchased a couple button making kits, one in 7/8 of an inch and one in 1/2 of an inch.

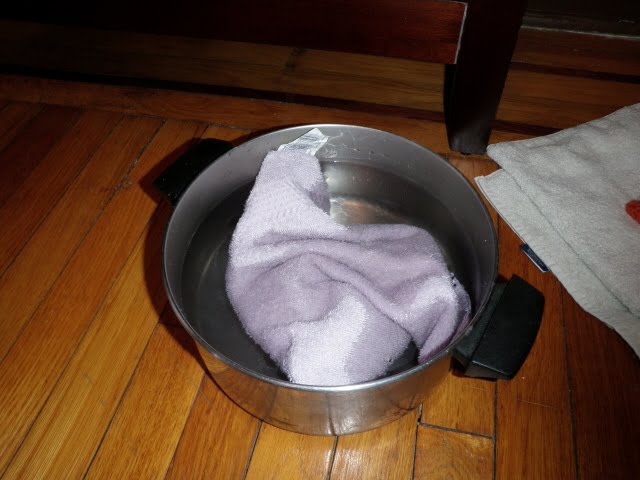
As soon as I got my fabric I began the exciting endeavor of making my very own buttons!!!

Supplies:


The first thing to do was to cut off a section of fabric that had a few different color flowers I could use.

The lucky piece:


Once that was done I needed to further cut the fabric so that I had a square with the color flower I wanted in the center.

The first color:


After this was done I went about placing the fabric in the correct position on the button. In the video he places the fabric in the...um I don't really know the word for it, but I will say...button well. I did it a little differently though. I placed the fabric over the front of the button and stretched a little while placing the button in the button well.

New term - Button Well:


Next you cut down any excess fabric and push it down into the back of the button, as shown in the video, and then place the back down and press it in with the back presser thingy (my terminology is outstanding I know). Once done just pop the button out and walah!

My First-ever Button!!:


As I went along I was better able to center the fabric, after all practice makes perfect, and I ended up with a product that made me really happy!

Buttons after some Practice:


I also made smaller buttons that I think match the scarf a little better.

All the Buttons from the Evening:


I really cannot wait to make more buttons with tons of different fabrics and flat backs as well as wire backs! All day I haven't been able to shut up about how much fun I had doing this and how very easy it is! A couple of things I realized in the process though are:
1) Don't worry if the placing isn't exactly right at first, you can pop the back off pretty simply and re-position the fabric as needed
2) Cutting off more fabric than needed is always better than underestimating. I was really scared at first to cut a lot because I didn't want to waste such pretty fabric, but once I realized that my underestimating was causing me to actually use more fabric I just cut out bigger blocks and it turned out great!

So, go crazy and have fun...and be sure to come back to see how the scarf turned out!

Tuesday, May 4, 2010

I never said I was Anything Special: The Tale of an Easy, yet Fun Card

As the title of this post might indicate the project I am about to outline is not that amazing, it is just fun. It is an easy way to send someone a card that shows you really took the time out of your day to think about them. The card is simple enough, use some stamps and yarn to create a personalized image with a nice bow tie to top it off! I will go ahead and show the end result to start with so that you know what you might be getting into if you want to make this, although as has been stated you can create any image you want to.

End Result:


The supplies I used for this were:

1. Cardstock - since I don't have a paper cutter at home I am lazy and buy this, but it is easy enough to make. I find the colors and varieties at Kate's Paperie great though and I love to mix and match, using one color for the card and another for the envelope.


2. STAMPS!! and acid free Ink - Despite what some might think, just because I love letterpress doesn't mean I don't love stamps. Stamps are so much fun because you can use them at home as a quick, easy, and enjoyable way to add flair to almost anything and create something new and original. I have so far gotten all of my limited supply of stamps from the Ink Pad and I can't see myself purposefully going anywhere else in NYC. The store itself is so small but it is packed full of great products. This card was for my mom who loves dragonflies and so I went out and got what I thought to be a lovely dragonfly stamp, just for this card, and added to it a couple other stamps I already had.


3. Yarn and Needle - I simply used a bit of yarn I already had laying around that I thought would match the card I was making...you can of course use string or anything like that. I also just used a tapestry needle to thread it through. I did get a bit too fancy with it by using a template I had gotten from an artist's book class in order to punch the holes, but I think it is pretty clear that this project is too simple to really worry about that.


Using this fancy template I was able to do a figure eight threading to give it a little oomph.


Once the yarn was tied in the middle I simply trimmed it down and made a bow.

So, I think it is pretty clear that all I really did here was go stamp crazy and then thread through the top of the card with pretty yarn and blamo! I got a card that truly matched the personality of who I was sending it to and I was able to do a little extra to show that I cared...not that I don't have to go buy cards sometimes....of course! :)