Drypoint is in the intaglio family and, as Wikipedia describes and I can attest to, the tool used to create the lines is much like a pencil. Drypoint plates were originally copper but now plexiglas is frequently used as well. Plexiglas is great because it is cheap and if you want to trace (like this non-artist did) you can easily tape an image under the plexiglas and let loose. Once you have created your burrs and your image is ready to go, you apply ink to the plate, wipe appropriately (this is great because you can create shadow and images in the ink on top of the plate), and print. I will leave the wikipedia page to explain the rest of the printing process and go on to explain my personal experience now.
The first step that had to be taken in order to create my drypoint was to decide on what I wanted to print. As I have already stated I am not an artist so I needed something that was either very easy or that I could trace. After debating between an owl or a book I finally decided on an owl and went to Mindy to ask if she had any images of owls that I could copy in order to trace them. She gave me a book of birds and after perusing it for a while I stumbled upon the image of an owl reading...how perfect!!!! I went to Staples, copied the image, and prepared for the adventure ahead of me!
Owl behind Plexi:
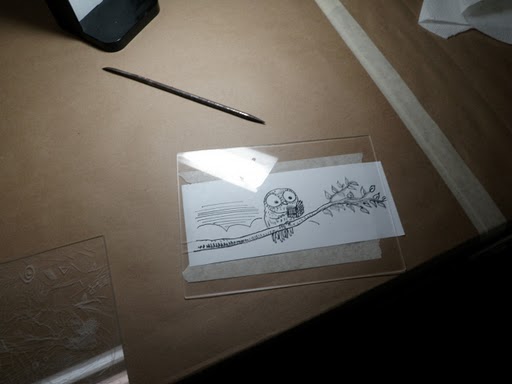
The actual tracing was a lot easier than I thought it was going to be. I worked with the sharp needle/pencil like tool to create burrs...pressing at an angle and re-working the lines of the leaves and the owl to give it a bit of a rougher, homemade feel.
Burring it up (sorry for the glare):

Once the lines were all set it was time to ink up!
Owl on Plexi:

I don't actually have any pictures of the inking process because it was way too messy for that. Even for a hardened pro it is probably impossible to snap shots with ink on their hands...but for a first timer such as myself I had to leave the camera completely out of the room! I put the ink on top of the plexiglas and made sure to get it deep into the burrs and then I worked on getting it off as best as possible with a cardboard type of spatula and a ball of grainy fabric (which I can't remember the name of). Once that was done we laid the slightly moist paper down in the press and ran it through! I actually love the end result and am excited to try this process again...I mean imagine what I can do with a little practice! I am thinking I should just buy some plexiglas and the burring tool and work at it until I create an image I really feel like I need to print! Once printed you can end up with a piece of art, or just something fun, to hang up in your home! I can't decide where to put mine yet, but it is for sure going up!
End Result:


Owls are great, and so was this post!
ReplyDelete